Mini Lemon Cake Recipe (Soft, Moist, and Brightly Flavored)
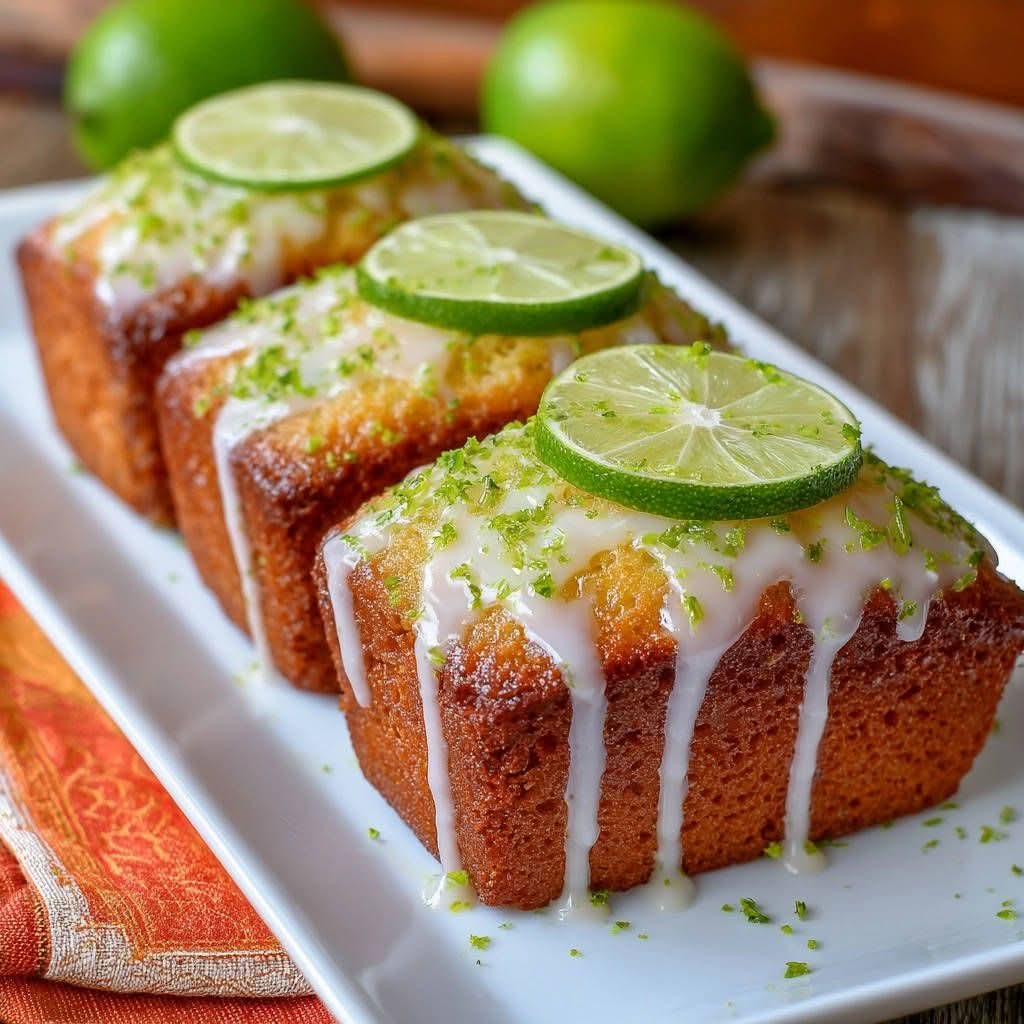
If you love light, citrusy desserts that feel both elegant and comforting, these mini lemon cakes are a must-try. Soft, tender, and bursting with fresh lemon flavor, they are perfectly sized for individual servings and ideal for afternoon tea, family gatherings, or a simple homemade treat.
Thanks to real lemon juice and zest, each cake delivers a refreshing balance of sweetness and tang. The buttery crumb stays moist for days, making this recipe dependable whether you are baking ahead or serving the same day. Best of all, these mini cakes come together easily with simple pantry ingredients and no complicated steps.
Why You’ll Love This Mini Lemon Cake
- Bright, natural lemon flavor from fresh juice and zest
- Soft and fluffy texture with a moist crumb
- Perfectly portioned for individual servings
- Simple ingredients and easy preparation
- Delicious plain or dressed up with powdered sugar or glaze
Ingredients
For the mini lemon cakes:
- 1½ cups all-purpose flour
- 1 teaspoon baking powder
- ¼ teaspoon baking soda
- A pinch of salt
- ½ cup unsalted butter, softened
- ¾ cup granulated sugar
- 2 large eggs, at room temperature
- 2 tablespoons fresh lemon zest (about 2 lemons)
- ¼ cup freshly squeezed lemon juice
- ½ cup whole milk, at room temperature
- 1 teaspoon vanilla extract
For topping (optional):
- Powdered sugar for dusting
- Thin lemon slices for garnish
How to Make Mini Lemon Cake
Step 1: Prepare the Oven and Pans
Preheat your oven to 350°F (175°C). Lightly grease a mini cake pan or 6 small ramekins with butter, then dust with flour to prevent sticking. Shake out any excess flour.
Step 2: Mix the Dry Ingredients
In a medium bowl, whisk together the flour, baking powder, baking soda, and salt. This step helps ensure even distribution of the leavening agents, giving the cakes a light and tender texture.
Step 3: Cream Butter and Sugar
In a large mixing bowl, beat the softened butter and granulated sugar using a hand mixer or stand mixer. Mix on medium speed for about 3–4 minutes, until the mixture becomes pale, fluffy, and creamy. This process incorporates air, which helps create a soft cake crumb.
Step 4: Add Eggs and Lemon Zest
Add the eggs one at a time, mixing well after each addition. Scrape down the sides of the bowl as needed. Stir in the lemon zest, allowing the oils from the zest to infuse the batter with fresh citrus aroma.
Step 5: Combine the Wet Ingredients
In a small bowl or measuring cup, whisk together the lemon juice, milk, and vanilla extract. This mixture adds both moisture and brightness to the cakes.
Step 6: Bring the Batter Together
Add the dry ingredients to the butter mixture in batches, alternating with the lemon-milk mixture. Begin and end with the dry ingredients. Mix gently and stop as soon as the batter is smooth. Overmixing can lead to dense cakes.
Step 7: Fill and Bake
Divide the batter evenly among the prepared pans, filling each about two-thirds full to allow room for rising. Bake for 20–25 minutes, or until a toothpick inserted into the center comes out clean or with a few moist crumbs.
Step 8: Cool and Serve
Let the mini cakes cool in their pans for about 10 minutes, then transfer them to a wire rack to cool completely. Just before serving, dust with powdered sugar and garnish with lemon slices if desired.
Serving Ideas
These mini lemon cakes are delicious on their own, but they also pair beautifully with:
- A light lemon glaze
- Fresh berries
- Whipped cream or yogurt-based topping
- A cup of tea or coffee
Storage Tips
- Store at room temperature in an airtight container for up to 2 days
- Refrigerate for up to 5 days for longer freshness
- Freeze unfrosted cakes for up to 2 months and thaw at room temperature
Final Thoughts
These mini lemon cakes are proof that simple ingredients can create something truly special. With their soft texture, fresh citrus flavor, and elegant appearance, they are perfect for everyday baking or special occasions alike. Once you try them, this recipe is sure to become a favorite in your kitchen.