The Ultimate 5-Step Greek Yogurt Recipe for Creamy Perfection
Summary
Greek yogurt is a creamy, tangy, and nutrient-rich dairy product that has become a kitchen staple for health enthusiasts and culinary experts alike. Known for its thick texture and high protein content, Greek yogurt is not only a delicious snack but also a versatile ingredient in countless recipes. Making it at home allows you to control the quality, flavor, and consistency without added preservatives or sugars. This ultimate 5-step guide walks you through crafting luscious Greek yogurt right in your kitchen, ensuring each spoonful is pure perfection.
Prep Time: 15 minutes
Cook Time: 8 hours (incubation)
Total Time: 8 hours 15 minutes
Servings: 6 cups
Calories per Serving: 100 kcal
Courses: Breakfast, Snack, Dessert
Cuisines: Mediterranean, Greek
Ingredients
- 1 gallon whole milk (or 2% for a lighter version)
- 2 tablespoons plain Greek yogurt (with live active cultures) as a starter
Equipment
- Large heavy-bottomed pot
- Thermometer
- Whisk
- Fine mesh strainer or cheesecloth
- Large bowl
- Spatula
- Airtight containers for storage
Instructions
Step 1: Heat the Milk
- Pour the milk into a large heavy-bottomed pot.
- Heat over medium heat until it reaches 180°F (82°C), stirring occasionally to prevent scorching.
- Once it hits 180°F, remove from heat and allow it to cool to 110°F (43°C).
Step 2: Add the Starter
- In a small bowl, mix the 2 tablespoons of plain Greek yogurt with a few tablespoons of the cooled milk.
- Whisk the mixture until smooth, then stir it back into the pot of warm milk.
Step 3: Incubate the Yogurt
- Cover the pot and keep it in a warm spot (like an oven with the light on) for 6-8 hours.
- For a tangier flavor, extend incubation up to 12 hours.
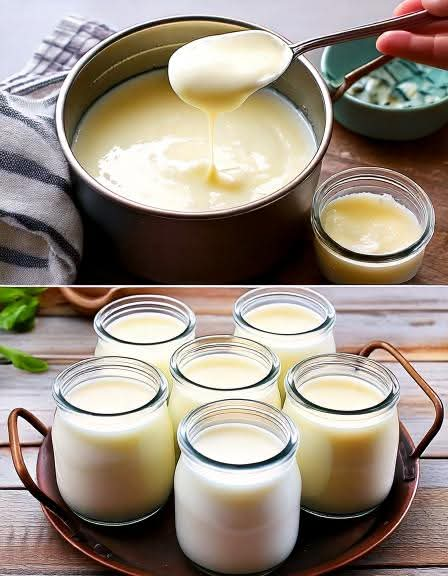
Step 4: Strain for Thickness
- Place a fine mesh strainer lined with cheesecloth over a large bowl.
- Pour the yogurt into the strainer and allow it to drain for 2-4 hours, depending on desired thickness.
Step 5: Store and Enjoy
- Transfer the thickened yogurt into airtight containers.
- Refrigerate for up to 2 weeks.
- Serve plain or with honey, fruit, or granola.
Recipe Variations
- Vanilla Greek Yogurt: Add 1 tablespoon vanilla extract and 2 tablespoons honey after straining.
- Fruit-Infused: Blend with fresh berries or mango before serving.
- Savory Yogurt Dip: Mix with chopped herbs, garlic, and lemon juice for a refreshing dip.
Frequently Asked Questions (FAQs)
1. Can I use non-dairy milk? Yes, but you’ll need a thickening agent like agar-agar or cornstarch.
2. How do I make my yogurt thicker? Strain longer or use whole milk for a creamier result.
3. Can I reuse my homemade yogurt as a starter? Absolutely! Use 2 tablespoons from your last batch, but after 4-5 cycles, start fresh.
4. Why did my yogurt turn out runny? It might need more incubation time or longer straining.
5. Is Greek yogurt healthier than regular yogurt? Greek yogurt has higher protein and lower sugar content, making it a nutritious choice.
Notes
- For a tangier flavor, extend the incubation time.
- Always use fresh milk and live cultures for best results.
- Sterilize your equipment to avoid unwanted bacteria.
Nutritional Info (Per Serving)
- Calories: 100 kcal
- Protein: 10g
- Carbohydrates: 5g
- Fat: 5g
- Calcium: 20% DV
- Sugar: 4g
Conclusion
Crafting homemade Greek yogurt is not only cost-effective but also incredibly rewarding. You gain complete control over the flavor, texture, and health benefits, ensuring a creamy and nutritious product every time. Whether you enjoy it sweet with honey and fruits or savory as a dip, this versatile ingredient is bound to elevate your culinary adventures. So, grab your pot and whisk, and dive into the art of making the perfect Greek yogurt today!