Homemade Bread Without a Bread Machine
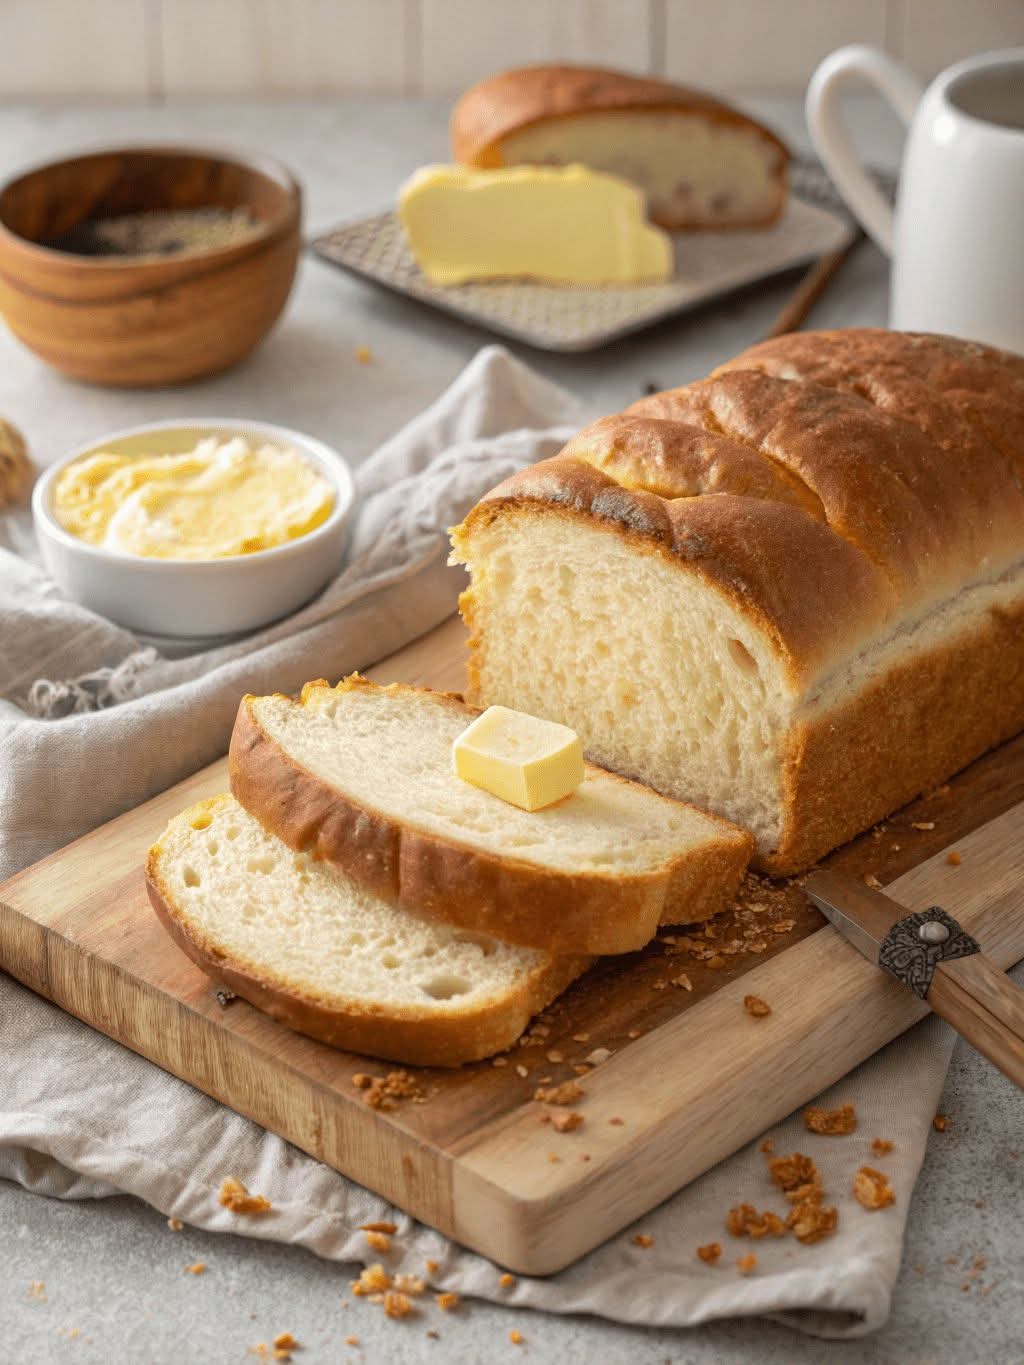
Freshly baked bread made right in your kitchen – soft, golden, and irresistibly delicious. You don’t need a bread maker to enjoy the comforting aroma of homemade bread. With just a few simple ingredients, you can create a beautiful loaf that stays soft and fresh for days.
This recipe gives you a golden crust, tender crumb, and that unmistakable homemade flavor. It’s perfect for sandwiches, toast, or simply enjoyed warm with a little butter.
Ingredients:
- 1 teaspoon active dry yeast
- 1 tablespoon sugar
- 525 g flour total — (150 g whole wheat flour and 375 g all-purpose flour)
- 400 ml warm water (250 ml for activating the yeast + 150 ml extra)
- 1½ teaspoons sea salt
- 1 tablespoon vegetable oil
Instructions:
Step 1: Activate the Yeast
Pour 250 ml of warm water into a medium bowl. Add the sugar and yeast, then stir well until dissolved. Set the bowl aside for about 10 minutes until the mixture becomes frothy — this means your yeast is active and ready to use.
Step 2: Mix the Dough
In a large mixing bowl, combine the whole wheat flour, all-purpose flour, and salt.
Pour in the activated yeast mixture and begin mixing with a wooden spoon or spatula.
Gradually add the remaining 150 ml of warm water, a little at a time, until a sticky dough forms.
Tip: Don’t be tempted to add more flour — the dough should feel slightly sticky at first. As it rests, it will absorb more flour and become easier to handle.
Step 3: Add the Oil and Knead
Add the vegetable oil and mix it into the dough until it’s fully incorporated. You can knead lightly in the bowl or on a lightly floured surface until the dough feels elastic and smooth.
Step 4: First Proofing
Shape the dough into a ball and place it in a lightly oiled bowl. Cover tightly with plastic wrap or a damp kitchen towel.
Let it rest in a warm, draft-free place for about 6 hours, or until the dough has tripled in size.
Step 5: Shape the Dough
After the first rise, gently punch down (degas) the dough to release excess air. Fold and stretch the dough two or three times to give it structure.
Shape it into a loaf and place it into a greased bread pan or shape it into smaller loaves or breadsticks if desired.
Optional: Sprinkle the top with black sesame seeds or your favorite toppings.
Step 6: Second Proofing
Cover the pan loosely with plastic wrap and let the dough rest again for about 1 hour, or until doubled in size.
Step 7: Bake the Bread
Preheat your oven to 400°F (200°C).
Bake the bread for 35–40 minutes, or until it’s beautifully golden brown and sounds hollow when tapped on the bottom.
Step 8: Finish and Cool
Once baked, remove the bread from the oven and immediately brush the top with a little butter to give it a shiny, soft crust.
Let the loaf cool completely on a wire rack before slicing.
Cooling is an important step — it allows the steam inside the bread to settle, giving you the perfect texture.
Tips for Perfect Homemade Bread:
- Always use fresh yeast for best results.
- A warm (not hot) environment helps the dough rise beautifully.
- Avoid adding too much flour — a slightly sticky dough creates softer bread.
- Store in an airtight container at room temperature for up to 3 days, or freeze for longer storage.
Why You’ll Love This Recipe
This simple bread recipe proves that you don’t need fancy equipment to bake bakery-quality bread at home. It’s hearty, soft, and versatile — perfect for breakfast, sandwiches, or dipping into soups and stews.