Heavenly Mini Vanilla Cakes – Moist, Buttery & Perfect for Any Occasion
Looking for the perfect bite-sized dessert that’s simple to make and full of rich vanilla flavor? These Mini Vanilla Cakes are just what you need! With a moist, buttery crumb and a delicate golden finish, they’re ideal for tea parties, birthdays, or a delightful treat any day of the week. Whether served plain or drizzled with chocolate ganache, these mini cakes are a guaranteed crowd-pleaser.
Why You’ll Love This Recipe
- Rich and buttery flavor with a soft, tender crumb
- Perfectly portioned for individual servings
- Simple ingredients and easy step-by-step instructions
- Versatile – enjoy plain or with your favorite glaze or topping
Ingredients
For the Mini Cakes:
- ½ cup (113g) unsalted butter, slightly cooler than room temperature
- 1 cup (200g) granulated sugar
- 2 large eggs, room temperature
- ⅔ cup (160ml) full-fat sour cream
- 2 teaspoons pure vanilla extract
- 1½ cups (180g) all-purpose flour
- 1 teaspoon baking powder
- ½ teaspoon salt
Instructions
Step 1: Prep Your Bakeware
Preheat your oven to 350°F (180°C). Grease and flour your mini cake molds or line them with parchment paper. Tap out any excess flour to ensure smooth edges.
Step 2: Cream the Butter and Sugar
In a large mixing bowl, beat the butter and sugar together using an electric mixer or stand mixer fitted with a paddle attachment. Mix on medium speed until the mixture becomes light and fluffy—this should take about 2–3 minutes.
Step 3: Incorporate the Eggs
In a small bowl, lightly whisk the eggs. Gradually add them to the butter mixture a little at a time, mixing well after each addition. This helps maintain a smooth batter and prevents curdling.
Step 4: Add the Sour Cream and Vanilla
Stir together the sour cream and vanilla extract, then beat this mixture into the batter until fully combined.
Step 5: Mix in the Dry Ingredients
In a separate bowl, sift together the flour, baking powder, and salt. With the mixer on low speed, slowly add the dry ingredients to the wet ingredients. Mix just until everything is incorporated—avoid overmixing to keep the cakes tender. Scrape down the sides and bottom of the bowl as needed.
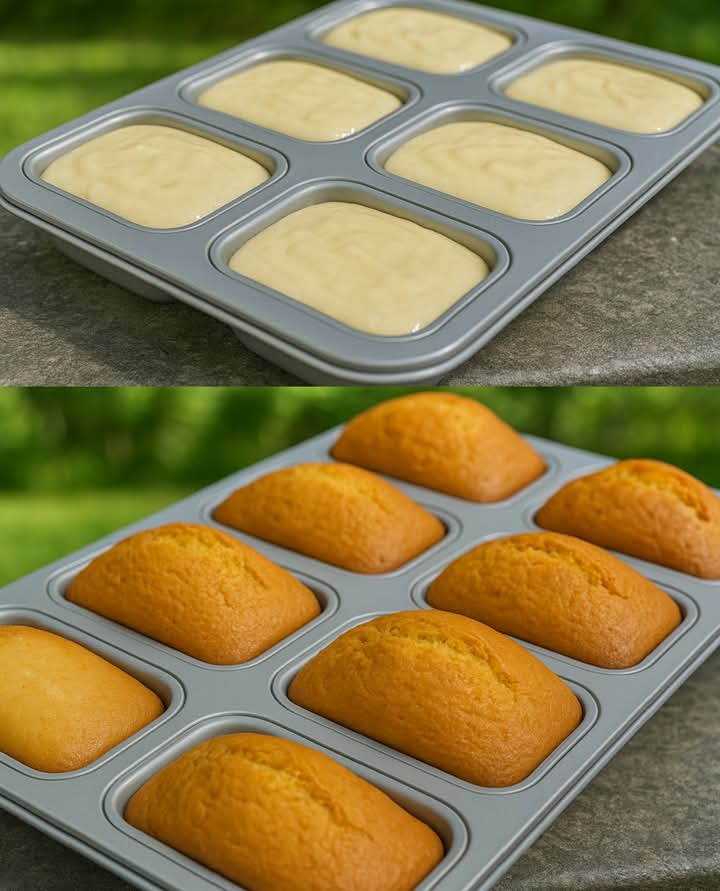
Step 6: Fill the Molds
Spoon the batter into the prepared molds, filling each about three-quarters full. Gently tap the molds on the counter to remove any trapped air bubbles. For extra smooth tops, you can run a skewer through the batter in each mold.
Step 7: Bake to Perfection
Bake in the preheated oven for 35–40 minutes, or until the tops are golden brown and a toothpick inserted in the center comes out clean. If using a standard cake tin, bake for 50–55 minutes.
Step 8: Cool and Serve
Allow the cakes to cool in the molds for 10 minutes, then transfer to a wire rack to cool completely. Serve plain for a classic treat, or finish with a rich chocolate ganache, fresh berries, or a dusting of powdered sugar.
Optional Chocolate Ganache Glaze
Ingredients:
- ½ cup heavy cream
- 100g semisweet or dark chocolate, finely chopped
Instructions:
Heat the cream until just simmering, then pour it over the chocolate. Let it sit for 2–3 minutes, then stir until smooth. Drizzle over the cooled cakes and let set before serving.
Pro Tips
- For extra moisture, wrap cooled cakes in plastic wrap and let them sit overnight before serving.
- Add a teaspoon of lemon zest for a bright citrus twist.
- These mini cakes freeze beautifully—just wrap and store for up to 2 months.
Storage
Store in an airtight container at room temperature for up to 3 days or refrigerate for up to a week. For longer storage, freeze and thaw at room temperature before serving.