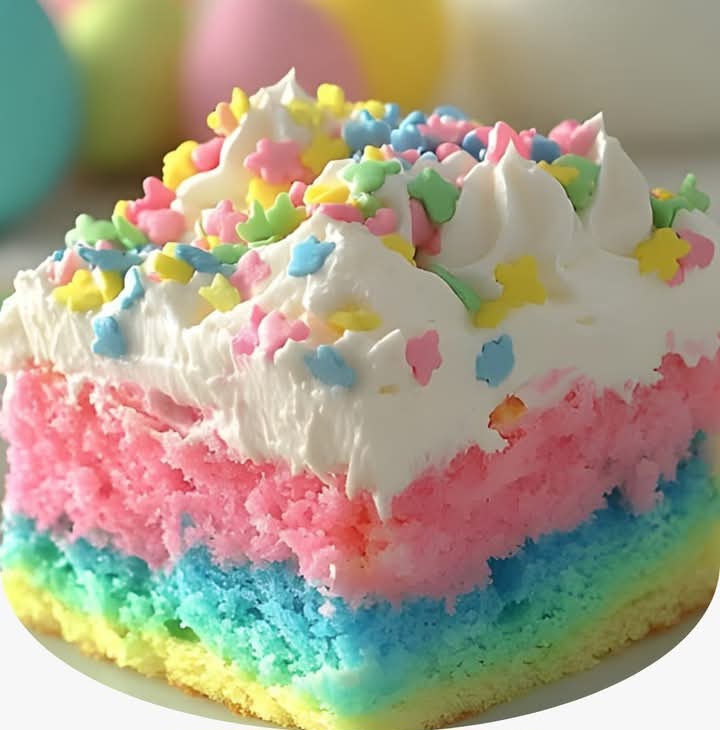
Easter Bunny Poke Cake: A Festive, Fluffy Dessert for Spring
If you’re looking for a showstopping dessert to celebrate Easter or springtime, this Easter Bunny Poke Cake is the perfect choice! This whimsical cake combines layers of soft vanilla cake, creamy pudding, and fluffy whipped topping, all adorned with adorable bunny decorations. It’s easy to make, fun to customize, and sure to delight both kids and adults alike.
Why You’ll Love This Recipe
This Easter Bunny Poke Cake is as cute as it is delicious! The moist cake absorbs a luscious milk-and-pudding mixture, creating a decadent, no-fuss dessert that’s ideal for parties or family gatherings. Plus, its customizable decorations let your creativity shine—whether you go for bunnies, pastel colors, or floral accents, this cake is guaranteed to be the star of your holiday spread.
Ingredients You’ll Need
For the Cake:
- 1 box white or yellow cake mix (plus required eggs, water, and oil per package instructions)
- 1/2 cup milk
- 1 (3.4 oz) box instant vanilla pudding mix
For the Whipped Topping:
- 1 container (8 oz) cool whip (or homemade whipped cream for a lighter option)
- 1/2 cup powdered sugar (optional, for sweetness)
- 1 teaspoon vanilla extract
For Decorating:
- Pastel candies (e.g., jelly beans, conversation hearts, or chocolate eggs)
- Marzipan or fondant for shaping bunny ears and noses
- Sprinkles in spring colors
- Fresh strawberries or raspberries for added flair
Step-by-Step Instructions
Step 1: Bake the Cake
Preheat your oven to 350°F (175°C). Grease and flour a 9×13-inch baking pan.
Prepare the cake mix according to the package instructions using eggs, water, and oil. Pour the batter into the prepared pan and bake for 25–30 minutes, or until a toothpick inserted into the center comes out clean.
Step 2: Create the Pudding Mixture
While the cake cools slightly, whisk together the milk and instant vanilla pudding mix in a mixing bowl until smooth. Let it sit for 5 minutes to thicken.
Step 3: Poke and Soak
Use the back of a wooden spoon or a fork to poke holes evenly across the surface of the warm cake. The holes should be deep enough to hold the pudding mixture but not so deep they reach the bottom of the pan.
Slowly pour the thickened pudding mixture over the cake, allowing it to soak into the holes. Spread any remaining pudding evenly over the top. Let the cake rest at room temperature for 15–20 minutes to absorb the liquid.
Step 4: Add the Whipped Topping
In a mixing bowl, combine the cool whip, powdered sugar (if using), and vanilla extract. Mix gently until combined.
Spread the whipped topping generously over the cooled cake, ensuring the entire surface is covered.
Step 5: Decorate Like a Bunny
Use marzipan or fondant to shape bunny ears, noses, and other features. Arrange them on the cake to create bunny faces.
Add pastel candies, sprinkles, or fresh fruit around the bunnies for a festive touch. Get creative with colors and designs to match your Easter theme!
Step 6: Chill and Serve
Refrigerate the cake for at least 1 hour before serving to allow the flavors to meld and the toppings to set.
Slice and serve this delightful Easter treat alongside tea, coffee, or milk for a complete experience.
Tips for Making the Best Easter Bunny Poke Cake
- Customize the Colors: Dye the whipped topping pastel shades like pink, blue, or yellow for an extra-springy look.
- Use Store-Bought Decorations: Save time by purchasing pre-made bunny decorations or candy ears.
- Add Extra Flavors: Stir almond or coconut extracts into the whipped topping for subtle variations.
- Make It Dairy-Free: Swap cool whip for a dairy-free alternative and use non-dairy milk for the pudding mixture.
- Store Properly: Keep leftovers refrigerated in an airtight container for up to 3 days.
Final Thoughts
This Easter Bunny Poke Cake brings together the best of springtime cheer and indulgent dessert magic. Its fluffy texture, creamy filling, and adorable bunny decorations make it perfect for Easter brunches, kid-friendly parties, or simply brightening someone’s day. So gather your ingredients, unleash your creativity, and enjoy the sweet celebration of the season!
If you loved this recipe, explore more festive desserts on our website. From holiday cakes to themed cookies, we’ve got everything you need to keep your celebrations sweet and memorable. Happy baking!
