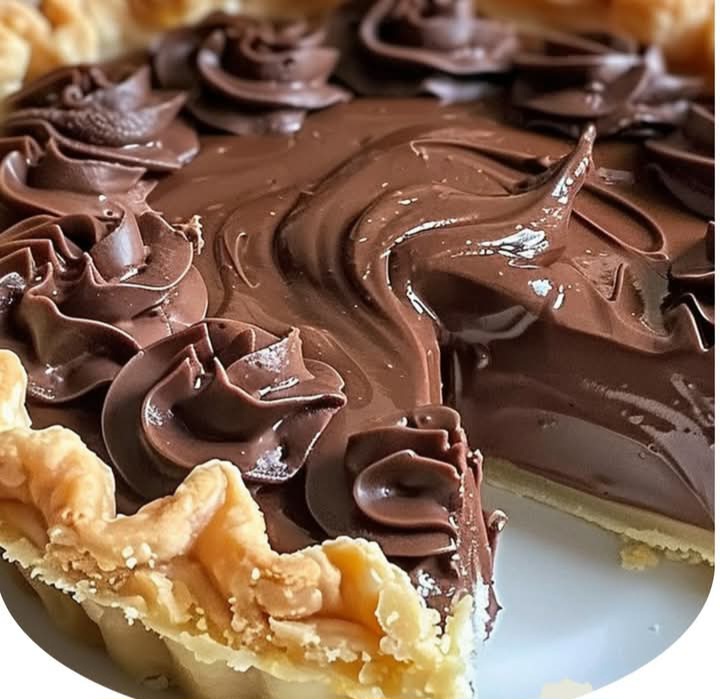
Old-Fashioned Chocolate Pie
A Classic Dessert That Never Goes Out of Style
There’s something special about an Old-Fashioned Chocolate Pie. With its rich, velvety chocolate filling and flaky, buttery crust, this dessert is a nostalgic favorite that brings comfort with every bite. Whether served at a family gathering, a holiday dinner, or simply enjoyed as an indulgent treat, this pie is guaranteed to satisfy your chocolate cravings.
In this guide, you’ll find step-by-step instructions, expert tips, and variations to make this timeless dessert even more special.
Why You’ll Love This Recipe
- Rich & Decadent – A smooth, creamy chocolate filling that melts in your mouth.
- Classic & Timeless – A beloved dessert that never goes out of style.
- Easy to Make – Simple ingredients and straightforward steps make this recipe beginner-friendly.
- Perfect for Any Occasion – Great for holidays, potlucks, or as a cozy family dessert.
Ingredients You’ll Need
For the Pie Crust:
- 1 1/4 cups all-purpose flour
- 1/2 teaspoon salt
- 1/2 cup unsalted butter (cold and cubed)
- 3–4 tablespoons ice water
Short on time? A store-bought pie crust works too!
For the Chocolate Filling:
- 1 1/2 cups granulated sugar
- 1/4 cup unsweetened cocoa powder
- 1/4 cup cornstarch
- 1/4 teaspoon salt
- 3 cups whole milk
- 4 large egg yolks (lightly beaten)
- 2 tablespoons unsalted butter
- 1 teaspoon vanilla extract
For the Topping (Optional):
- Whipped cream
- Chocolate shavings or curls
Step-by-Step Instructions
Step 1: Make the Pie Crust
- In a large bowl, whisk together the flour and salt.
- Cut in the cold butter using a pastry cutter or your fingers until the mixture resembles coarse crumbs.
- Gradually add the ice water, one tablespoon at a time, mixing just until the dough comes together.
- Shape the dough into a disc, wrap it in plastic wrap, and refrigerate for at least 30 minutes.
- Roll out the chilled dough on a floured surface and transfer it to a 9-inch pie dish. Trim and crimp the edges as desired.
- Preheat your oven to 375°F (190°C). Prick the bottom of the crust with a fork, line it with parchment paper, and fill it with pie weights or dried beans.
- Bake for 15 minutes, then remove the weights and parchment. Bake for another 10 minutes, or until golden brown. Let it cool completely.
Step 2: Prepare the Chocolate Filling
- In a medium saucepan, whisk together the sugar, cocoa powder, cornstarch, and salt.
- Gradually whisk in the milk until smooth.
- Cook over medium heat, stirring constantly, until the mixture thickens and comes to a boil.
- Boil for 1 minute, then remove from heat.
- Gradually whisk about 1 cup of the hot mixture into the beaten egg yolks to temper them.
- Return the egg mixture to the saucepan and cook for 2–3 minutes, stirring constantly, until thickened.
- Remove from heat and stir in the butter and vanilla extract until smooth.
Step 3: Assemble the Pie
- Pour the warm chocolate filling into the cooled pie crust.
- Smooth the top with a spatula and let it cool to room temperature.
- Refrigerate for at least 4 hours (or overnight) to set.
Step 4: Add Toppings & Serve
- Top with whipped cream and chocolate shavings if desired.
- Slice and serve chilled.
Tips for the Perfect Chocolate Pie
- Use High-Quality Cocoa: For the best flavor, opt for premium unsweetened cocoa powder.
- Don’t Skip Tempering: Gradually adding hot liquid to the eggs prevents curdling and ensures a smooth filling.
- Chill Thoroughly: Refrigerating the pie for at least 4 hours allows it to set properly.
- Make It Ahead: This pie can be prepared a day in advance and stored in the refrigerator.
Why This Pie is a Must-Try
This Old-Fashioned Chocolate Pie is more than just a dessert—it’s a slice of tradition. With its luscious chocolate filling, buttery crust, and simple ingredients, it’s the perfect treat for any occasion.
Frequently Asked Questions (FAQs)
1. Can I use a store-bought crust?
Yes! A store-bought crust works well if you’re short on time.
2. How do I store leftovers?
Store leftovers in the refrigerator for up to 5 days. Cover with plastic wrap to prevent the filling from drying out.
3. Can I make this pie gluten-free?
Absolutely! Use a gluten-free pie crust and ensure all other ingredients are gluten-free.
4. Can I freeze this pie?
Yes! Freeze the pie (without toppings) in an airtight container for up to 3 months. Thaw in the refrigerator before serving.
Final Thoughts
This Old-Fashioned Chocolate Pie is a timeless dessert that brings comfort and indulgence in every bite. Whether you’re making it for a celebration or just to treat yourself, it’s sure to impress.
So, gather your ingredients, follow these simple steps, and enjoy a slice of chocolate perfection. Happy baking!
