Introduction
Mini snacks are the perfect addition to any gathering, whether it’s a party, a casual get-together, or just a cozy night in. These bite-sized treats are not only delicious but also incredibly versatile, allowing you to experiment with flavors and ingredients to suit your taste. Making them at home gives you the freedom to create something unique and tailored to your preferences.
One of the best things about these mini snacks is how quick and easy they are to make. With just a handful of ingredients and a few simple steps, you can have a batch of warm, golden-brown treats ready to enjoy. Whether you’re an experienced baker or just starting, this recipe is designed to be beginner-friendly, ensuring a smooth and enjoyable cooking process.
Ingredients
To make these mini snacks, you will need the following ingredients:
For the Dough:
- 1 cup all-purpose flour
- 1/2 cup granulated sugar
- 1 teaspoon baking powder
- A pinch of salt
- 1/2 cup milk
- 4 tablespoons melted butter
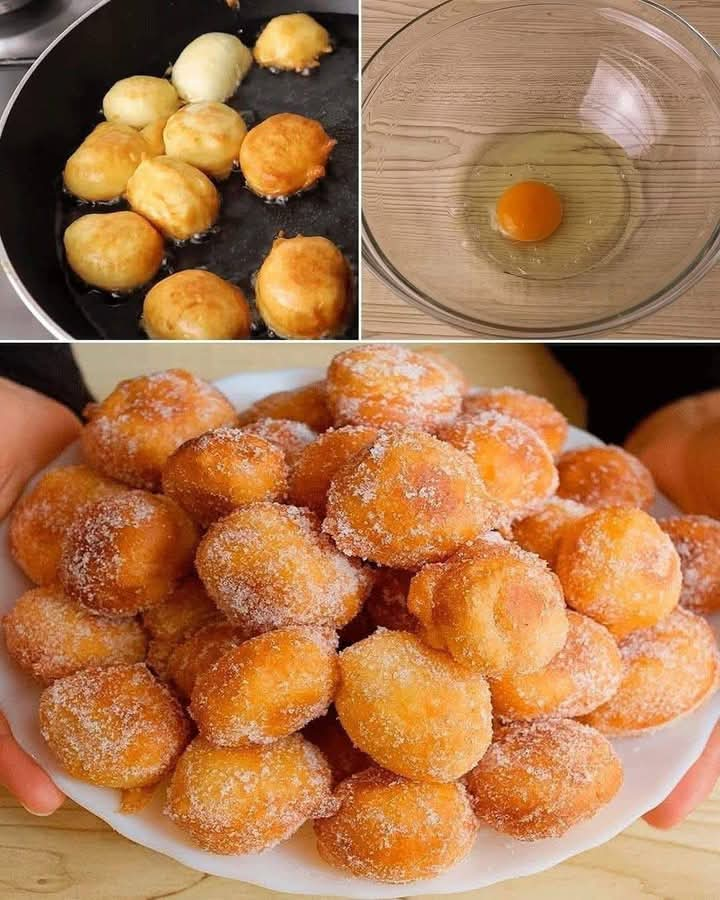
- 1 large egg, beaten
- 1 teaspoon vanilla extract
- 1/4 cup chopped hazelnuts (optional)
For the Glaze:
- 1 cup powdered sugar
- 2 tablespoons milk (or water)
- 1/2 teaspoon vanilla extract
Optional Toppings:
- Melted chocolate
- Cinnamon sugar
- Sprinkles
- Crushed nuts
Instructions
Step 1: Prepare the Dough
- In a large mixing bowl, whisk together the all-purpose flour, sugar, baking powder, and salt until well combined.
- In a separate bowl, mix the milk, melted butter, beaten egg, and vanilla extract until smooth.
- Gradually pour the wet mixture into the dry ingredients, stirring gently until just combined. Be careful not to overmix, as this can result in dense snacks.
- If you’re adding chopped hazelnuts, gently fold them into the batter.
Step 2: Bake the Mini Snacks
- Preheat your oven to 375°F (190°C) and grease a mini donut pan or small muffin tin.
- Spoon the batter into the pan, filling each cavity about three-quarters full.
- Bake for 8-10 minutes, or until a toothpick inserted into the center comes out clean.
- Let the snacks cool in the pan for a few minutes before transferring them to a wire rack to cool completely.
Step 3: Prepare the Glaze and Toppings
- In a small bowl, whisk together the powdered sugar, milk, and vanilla extract until smooth and slightly thick.
- Dip the cooled mini snacks into the glaze or drizzle it over the top.
- While the glaze is still wet, sprinkle on your favorite toppings, such as melted chocolate, cinnamon sugar, or sprinkles.
- Let the glaze set for about 15-20 minutes before serving.
Variations
One of the best things about this recipe is its adaptability. Here are a few creative variations you can try:
- Chocolate Delight: Add 2 tablespoons of cocoa powder to the dry ingredients or drizzle the finished snacks with melted chocolate.
- Citrus Twist: Mix in some orange or lemon zest for a refreshing burst of flavor.
- Spiced Version: Add 1/2 teaspoon of cinnamon and a pinch of nutmeg to the batter for a warm, comforting taste.
- Healthier Option: Swap half of the all-purpose flour for whole wheat flour or almond flour and use honey instead of sugar.
Expert Tips for Perfect Mini Snacks
- Ensure your baking powder is fresh, as it helps the snacks rise properly.
- If your batter is too thick, add a splash of milk; if it’s too runny, add a little more flour.
- Use a piping bag or small spoon to evenly distribute the batter in the pan.
- Let the snacks cool completely before glazing to prevent the glaze from melting off.
- Store leftovers in an airtight container to keep them fresh longer.
How to Store
If you have leftovers, store them properly to maintain their freshness:
- At Room Temperature: Place them in an airtight container for up to two days.
- In the Refrigerator: Store in an airtight container for up to a week.
- In the Freezer: Freeze in a single layer on a baking sheet, then transfer to a freezer-safe bag. Thaw at room temperature or warm in the oven before serving.
Conclusion
These mini snacks are a delightful treat, perfect for any occasion. Their small size makes them ideal for sharing, and their customizable nature ensures that there’s something for everyone to enjoy. Whether you’re making them for a party, a cozy night in, or simply as a quick snack, they are sure to be a hit.
The best part? You can get as creative as you like with flavors and toppings, making each batch uniquely yours. So, gather your ingredients, have fun in the kitchen, and enjoy making these delicious mini snacks!