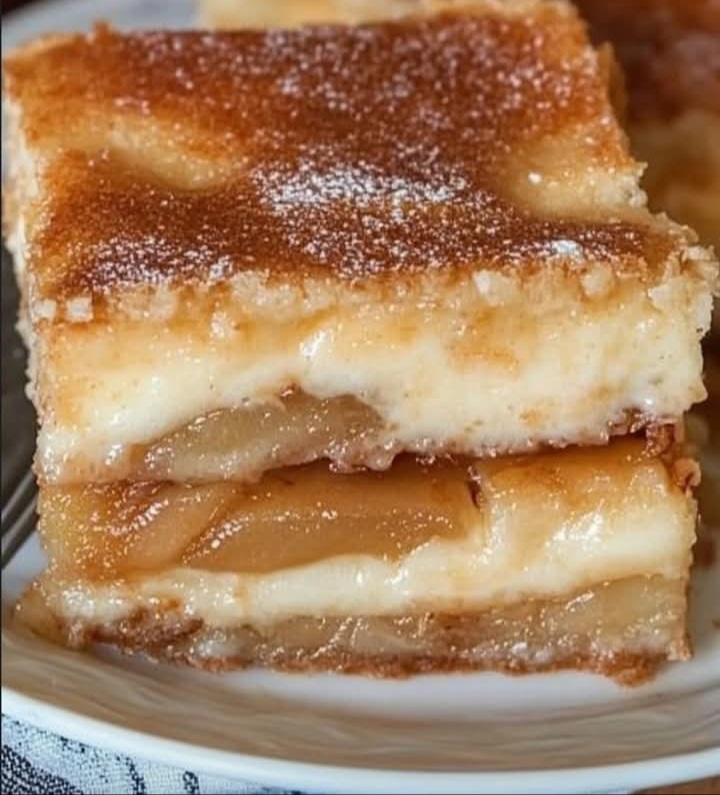
An Irresistible Fusion of Cheesecake and Danish
Apple cheesecake Danish bars are a delightful dessert that combines the creamy richness of cheesecake with the comforting flavors of apple pie. These bars feature layers of flaky pastry, a creamy cheesecake filling, and a sweet apple pie topping. They make for a perfect treat for dessert, brunch, or anytime you crave a delectable sweet indulgence.
Imagine the aroma of baked apples and cinnamon, the sight of the golden pastry, and the taste of the velvety cheesecake filling. Visualize yourself cutting into a square of these bars and savoring the delightful blend of textures and flavors. Let’s embark on creating this delicious dessert together.
Ingredients:
A Collection of Ingredients for Apple Cheesecake Danish Bars
For the Pastry:
- 1 sheet puff pastry (store-bought or homemade)
For the Cheesecake Layer:
- 8 oz cream cheese, softened
- 1/2 cup granulated sugar
- 1 large egg
- 1 teaspoon vanilla extract
For the Apple Pie Topping:
- 2 medium apples, peeled, cored, and thinly sliced
- 2 tablespoons unsalted butter
- 1/4 cup granulated sugar
- 1 teaspoon ground cinnamon
- 1/4 teaspoon ground nutmeg
- 1/4 teaspoon salt
For Glaze (Optional):
- 1/2 cup powdered sugar
- 1-2 tablespoons milk
- 1/2 teaspoon vanilla extract
Instructions:
Creating Delicious Apple Cheesecake Danish Bars
1. Preparing the Pastry:
- If using frozen puff pastry, follow the package instructions for thawing. If using homemade puff pastry, roll it out into a rectangle that fits your baking dish (typically 9×13 inches) and transfer it to a greased baking dish.
2. Making the Cheesecake Layer:
- In a mixing bowl, beat the softened cream cheese until it’s smooth and creamy.
- Add granulated sugar, egg, and vanilla extract. Mix until well combined and smooth.
3. Spreading the Cheesecake Layer:
- Spread the cheesecake mixture evenly over the prepared puff pastry in the baking dish.
4. Sautéing the Apples:
- In a skillet over medium heat, melt the butter. Add thinly sliced apples, granulated sugar, ground cinnamon, ground nutmeg, and salt.
- Sauté the apples for about 5-7 minutes, or until they become tender and slightly caramelized. Remove from heat.
5. Adding the Apple Pie Topping:
- Spread the sautéed apple slices over the cheesecake layer in the baking dish.
6. Baking:
- Preheat your oven to 375°F (190°C). Place the baking dish in the preheated oven.
- Bake for about 25-30 minutes or until the pastry is golden brown and the cheesecake layer is set.
7. Glazing (Optional):
- While the bars are baking, prepare the glaze. In a bowl, combine powdered sugar, milk, and vanilla extract until you have a smooth glaze.
- Once the bars are done baking, drizzle the glaze over them while they’re still warm.
8. Cooling and Serving:
- Allow the bars to cool in the baking dish for about 15-20 minutes.
- Slice into squares or rectangles, serve, and enjoy!
Tips and Variations:
Elevate Your Apple Cheesecake Danish Bars Experience
Tips:
- To prevent the pastry from becoming too soggy, you can sprinkle a thin layer of breadcrumbs or ground nuts (such as almonds or walnuts) over the puff pastry before adding the cream cheese layer.
Variations:
- Get creative with the fruit topping. You can use other fruits like pears, peaches, or berries in place of the apples.
Pairing Suggestion: Serve your apple cheesecake Danish bars with a scoop of vanilla ice cream or a dollop of freshly whipped cream for an extra indulgent treat.
Storage and Enjoyment: Leftover bars can be stored in an airtight container in the refrigerator for up to 2-3 days. They can be enjoyed chilled or briefly warmed in the microwave before serving.
Cook’s Note: Apple cheesecake Danish bars are a delicious fusion of classic dessert flavors. As you savor each bite, appreciate the combination of creamy cheesecake, sweet apple pie, and flaky pastry. Share this delightful dessert with family and friends, explore different fruit variations, and revel in the joy of indulging in a homemade sweet treat that’s perfect for any occasion.
